How QX Packs turns a visual packaging concept into a feasible structure, dieline, sample and bulk-production order
AI-generated packaging images can be useful for communicating a visual direction.
They may help a buyer show a preferred color, opening experience, surface style, insert layout or overall brand feeling.
However, an attractive AI image does not prove that the packaging can actually be manufactured.
AI-generated images may contain impossible openings, unsupported inserts, inconsistent proportions, missing connection points or materials that cannot be assembled in the way shown. An image may look convincing while the physical structure does not work.
For this reason, QX Packs can use an AI image as a visual reference, but not as a production-ready structural drawing, dieline or final artwork file.
Before an accurate quotation, sample or bulk order can be prepared, the visual concept must be converted into a feasible packaging specification.
Quick Answer
An AI packaging image can help explain what a brand wants the packaging to look like, but it is not enough for accurate quotation or production.
To evaluate a project, a packaging manufacturer still needs:
- Real product photos
- Accurate product dimensions
- Product weight
- Number of items inside each box
- Required order quantity per design
- Preferred opening method
- Material and finishing direction
- Insert and accessory requirements
- Logo or artwork status
- Delivery country
If the final structure is not yet confirmed, QX Packs can first review the product information and visual reference, suggest a feasible direction and prepare a preliminary price estimate.
The project should move into detailed sample development only when the estimated price and proposed direction are within the buyer’s acceptable range.
Why an AI Packaging Image May Be Structurally Incorrect
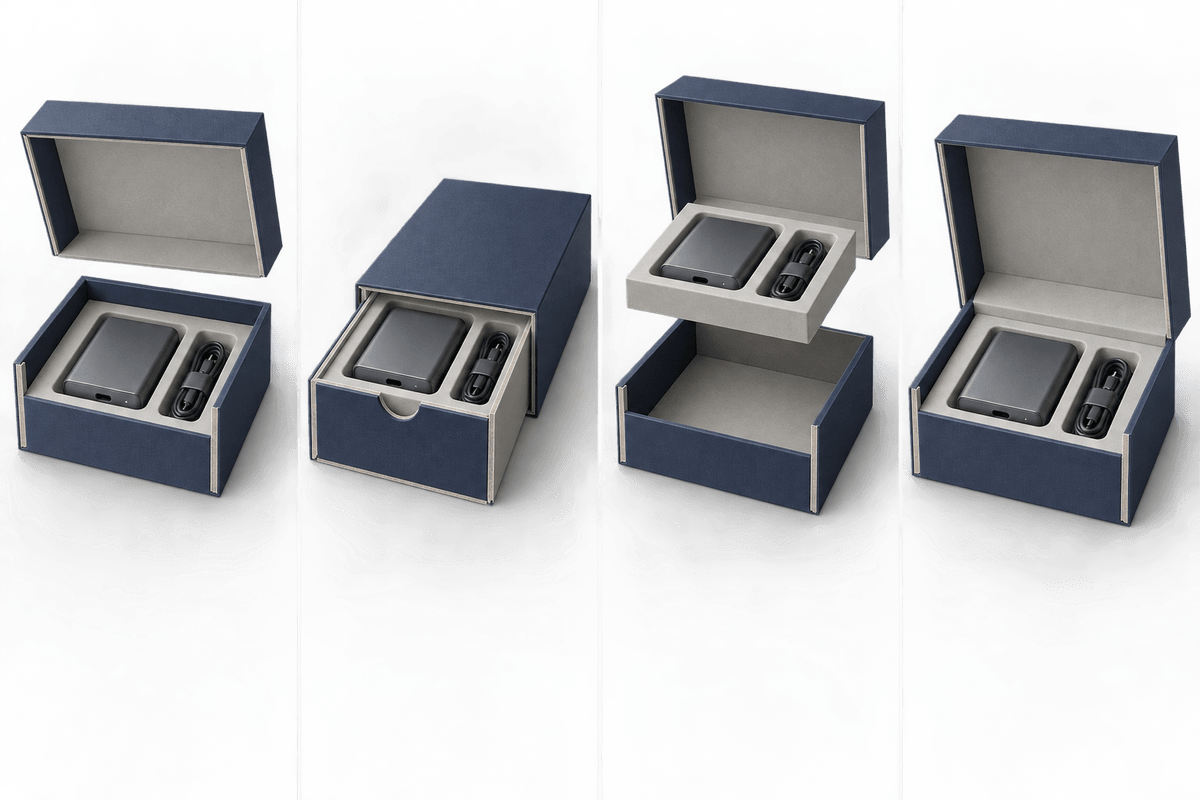
AI image tools generate visual concepts. They do not automatically calculate material thickness, folding space, assembly methods, tolerances or product fit.
Common problems include:
An Opening Method That Cannot Work
The image may appear to combine a drawer, hinged lid and removable top in one box without showing how the components are connected.
A lid may appear to float, or a drawer may have no practical space to slide into the outer sleeve.
Missing Hinges, Magnets or Connection Points
A hinged box needs a workable connection between the lid and base.
A magnetic box needs enough board thickness and internal space for the magnets. Hardware, locks and handles also need proper fixing positions.
AI images often show these effects without explaining how they would be installed.
Unsupported or Floating Inserts
An insert may appear to float inside the box without a supporting base, wall or platform.
The cavities may also be too close to the edge or too deep for the actual box height.
For products that need protection and presentation, the outer box and custom insert must be developed together.
Inconsistent Product and Box Proportions
The product may appear smaller in one part of the image and larger in another.
A watch, bottle, device or accessory may look as though it fits, but the image does not provide the actual internal clearance required for the product.
Materials That Do Not Behave as Shown
Paperboard, rigid board, MDF, wood, plastic and metal have different structural limitations.
An AI image may show an extremely thin wall with the appearance of wood, a paper box supporting heavy hardware, or a complex curved structure without visible joints.
The visual material and the workable production material may not be the same.
No Allowance for Manufacturing
Real packaging needs space for:
- Board and paper thickness
- Folding and wrapping
- Glue areas
- Hinges and magnets
- Drawer clearance
- Product removal
- Insert support
- Printing bleed
- Cutting tolerance
- Assembly
These details cannot be confirmed from an AI image alone.
AI Image, Artwork and Dieline Are Not the Same
| File or Reference | What It Can Show | What It Cannot Confirm |
|---|---|---|
| AI-generated image | Visual style, color direction, general opening idea and presentation goal | Accurate dimensions, feasible structure, material thickness, assembly or production cost |
| Reference photograph | Existing box style, finish, material appearance and opening experience | Exact size, internal construction, material specification or product fit |
| Product drawing or measurements | Actual product dimensions, shape and layout requirements | Final box structure, branding or production artwork |
| Editable brand artwork | Logo, text, graphics, colors and printed content | Box construction if it is not placed on an approved dieline |
| Confirmed dieline | Cutting lines, folding lines, panels, dimensions and structural layout | Final printed result until the approved artwork is added |
| Physical sample | Structure, dimensions, opening, product fit, materials and appearance | Final bulk-production consistency until production requirements are approved |
An AI image should therefore be treated as the beginning of the discussion—not as the final manufacturing instruction.
What Buyers Should Prepare First
If you already have an accurate design specification, send it with the project inquiry.
If you only have an AI image or reference photo, prepare the following information before requesting a useful estimate.
1. Real Product Photos
Send clear photographs from the front, side, top and back.
If several items go into one package, include one photograph showing the complete set. Also include accessories such as chargers, straps, manuals, cards, tools or cables.
2. Accurate Product Dimensions
Provide the length, width and height of every item.
For round products, include the diameter. For irregular products, measure the widest and highest points.
For products with crowns, pumps, handles, buckles, clasps or other projecting parts, include those dimensions as well.
3. Product Weight
Weight affects the outer structure and insert support.
A lightweight cosmetic tube, a glass bottle and a metal electronic device may need very different packaging, even if their dimensions appear similar.
4. Quantity per Design
Provide the required quantity for each printed design or product version—not only the combined project quantity.
Quantity influences the possible production method, unit cost, material preparation and finishing setup.
5. Functional Requirements
Explain what the packaging must do.
For example:
- Open like a book
- Slide out like a drawer
- Display the product immediately
- Hold several items separately
- Protect a fragile product
- Include a removable tray
- Store a manual or warranty card
- Support retail display
- Work for e-commerce delivery
6. Material and Finishing Direction
If you know the preferred material, include it.
If not, explain the expected packaging level, such as cost-effective, premium, luxury, retail-ready or shipping-focused.
Also mention finishes such as:
- Matte or gloss lamination
- Foil stamping
- Embossing or debossing
- Spot UV
- Textured paper
- Printed patterns
- Metal hardware
- Fabric or velvet lining
7. Artwork Status
Tell us whether you currently have:
- Only an AI reference image
- A logo file
- A complete visual design
- Editable artwork
- An existing dieline
- Previous packaging samples
- No artwork yet
This helps determine whether the project is ready for quotation, structural development or design support.
The QX Packs Packaging Development Process
QX Packs supports custom packaging projects from the first concept review through sampling and bulk production.
The following process explains how a visual reference becomes a manufacturable packaging product.
Step 1: Review the Design and Prepare a Preliminary Estimate
If the buyer already has a clear packaging design, we review the available documents together with the requested size, quantity, materials, finishes and insert requirements.
If there is no complete design yet, the buyer can provide:
- AI-generated images
- Reference packaging photographs
- Product photographs
- Product dimensions and weight
- Required quantity per design
- Preferred materials
- Printing and finishing requirements
- Insert and accessory requirements
At this stage, an AI image is used only to understand the visual direction.
We evaluate whether the requested appearance can be converted into a practical structure. If important details are missing, the price can only be a preliminary estimate rather than a final production quotation.
Buyers can also review our available custom packaging solutions before selecting a box direction.
Step 2: Confirm Whether the Estimated Price Is Acceptable
Before investing in detailed structural development and sampling, the buyer should first confirm whether the preliminary estimated price is within the acceptable project range.
The estimate may be based on assumptions about:
- Box structure
- Approximate dimensions
- Base material
- Surface material
- Printing and finishing
- Insert direction
- Order quantity
- Packing requirements
If the price direction is not suitable, the structure, material or finishing may need to be simplified before sampling.
If the estimated price is acceptable, the project can move into sample development.
This step avoids spending time and sample cost on a packaging direction that does not match the buyer’s budget or production quantity.
Step 3: Send the Actual Product Sample
For packaging with fitted inserts or precise internal dimensions, the buyer should preferably send the actual product to QX Packs.
Whenever possible, it is usually faster and more economical to arrange the product shipment from the buyer’s supplier in China rather than sending it internationally.
The physical product allows us to check:
- Actual dimensions
- Weight
- Widest and highest points
- Fragile or sensitive surfaces
- Product balance
- Required clearance
- Accessory layout
- Product removal space
- Insert support
- Box opening direction
For a multi-item set, all products and accessories should be included.
If sending the actual product is not possible, the buyer should provide accurate technical drawings, complete measurements, weight and clear photographs. However, product fit may remain subject to later physical verification.
Step 4: Determine the Size and Make a White Prototype
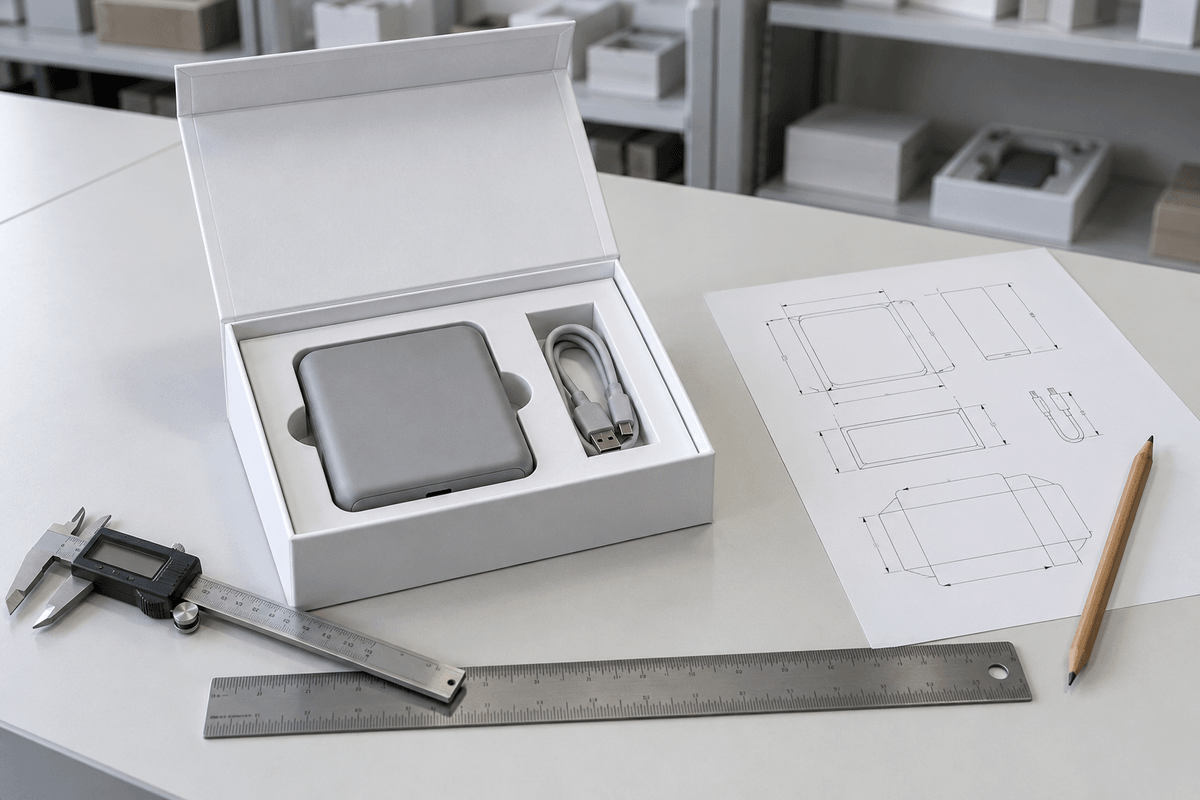
After receiving the actual product or sufficiently accurate product information, we determine a more precise packaging size and develop the proposed structure.
A white prototype is then produced to check:
- Outer dimensions
- Internal dimensions
- Opening and closing
- Product fit
- Insert layout
- Product removal
- Lid clearance
- Drawer movement
- General structural stability
The white prototype normally focuses on structure and size rather than final printing and decoration.
QX Packs photographs and records video of the white prototype for the buyer to review.
At this stage, the structure and dimensions can still be adjusted.
For example, the buyer may request:
- More space around the product
- A tighter or looser insert
- A different opening direction
- A deeper base
- A lower insert platform
- An additional accessory compartment
- Easier product removal
- A more compact outer size
The white-prototype stage is the most practical time to correct structural issues before final artwork and finishing are added.
Step 5: Confirm the Dieline and Prepare the Artwork
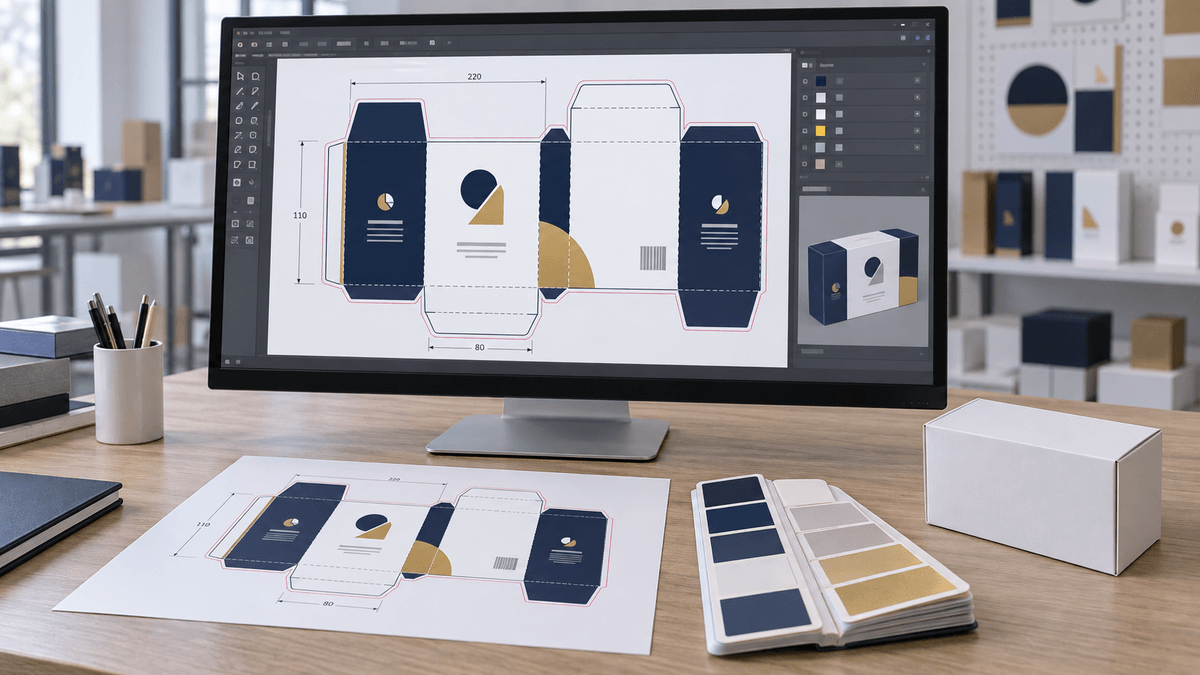
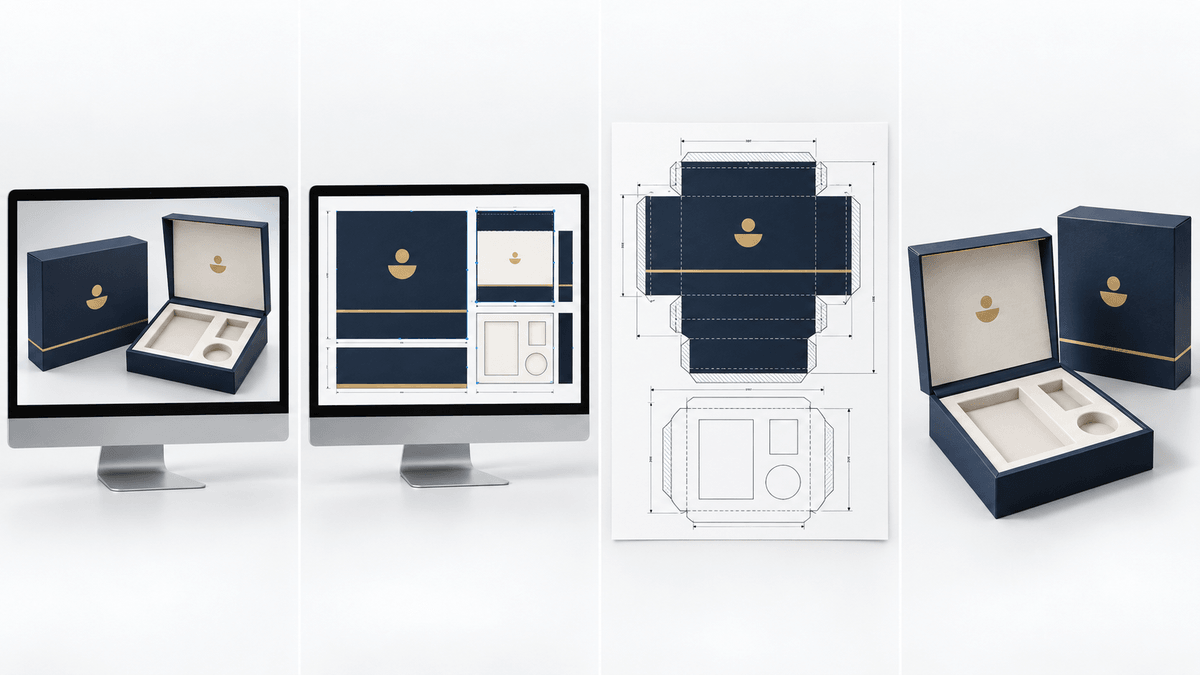
After the white prototype and dimensions are approved, QX Packs provides the corresponding dieline file.
The dieline shows the correct panel layout, cutting lines, folding lines and structural positions needed for the approved box.
The buyer or the buyer’s designer can then add:
- Logo
- Brand colors
- Product name
- Instructions
- Patterns
- Barcodes
- Legal text
- Finishing positions
- Inner and outer graphics
The final artwork should be prepared on the confirmed dieline, not directly copied from an AI-generated image.
Editable files are normally preferred for production preparation.
If the buyer does not have a designer, QX Packs can provide design support as a paid service. The design scope and fee should be confirmed separately before the work begins.
If you are developing a rigid structure, you can also review our custom rigid box options.
Step 6: Produce the Final Printed Sample
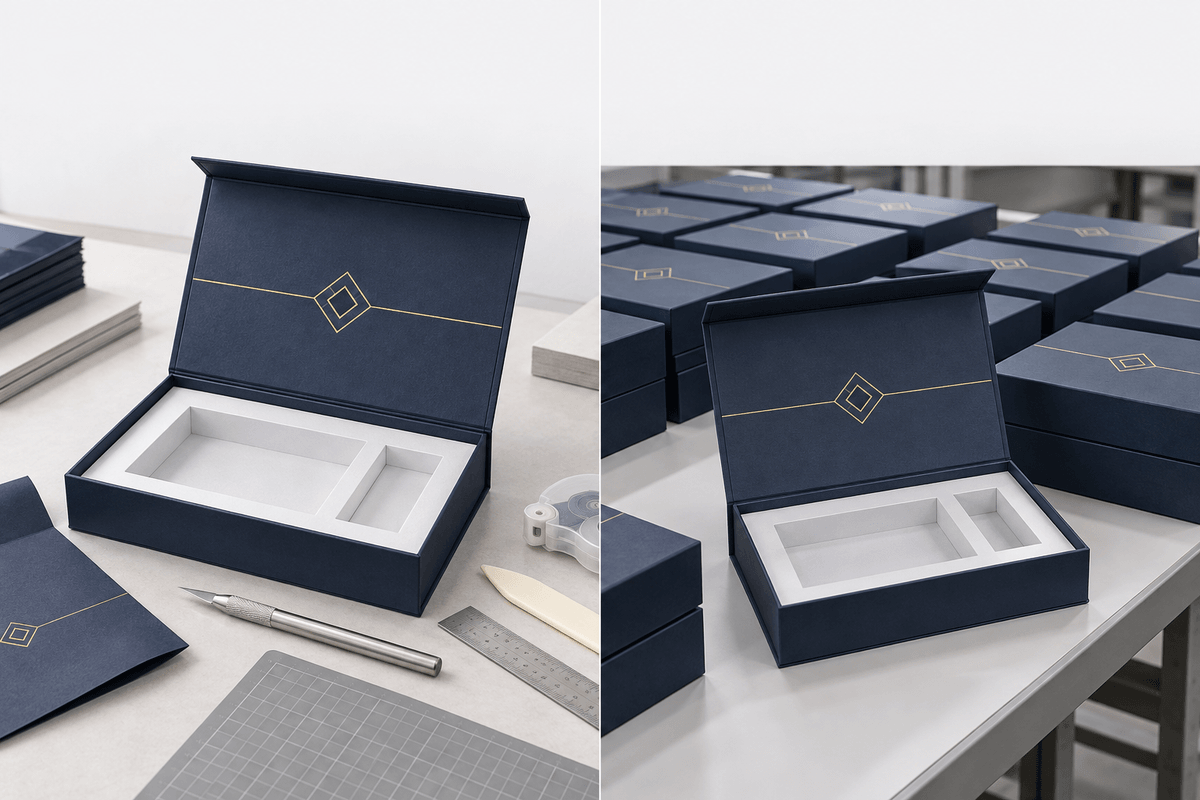
After the artwork is confirmed, QX Packs produces the final printed or color sample.
This sample is used to review:
- Printed artwork
- Logo position
- Colors
- Materials
- Surface finishing
- Foil stamping
- Embossing or debossing
- Insert appearance
- Product presentation
- Overall opening experience
It is important to understand that custom packaging samples are often cut and assembled by hand.
They may not use the same die-cutting and full production setup as the bulk order. As a result, a handmade sample may look slightly rougher in some edges, folds, wrapping areas or hand-assembled details than the final mass-produced packaging.
The sample is intended to confirm the structure, dimensions, product fit, material direction, artwork and finishing before production.
After the sample is completed, QX Packs sends photographs and videos to the buyer for review.
For additional approval points, buyers can use our custom packaging sample checklist.
Step 7: Choose How to Approve the Sample
Buyers normally have two approval options.
Option 1: Approve from Photographs and Videos
Some buyers do not require the physical sample to be shipped internationally.
They review the detailed photographs and videos and approve the next stage remotely.
This may save courier time and cost, especially when the buyer is already familiar with the material and finishing direction.
However, photographs and videos cannot fully communicate texture, weight, color or hand feel.
Option 2: Ship the Physical Sample to the Buyer
The buyer may ask QX Packs to send the sample to a designated address.
After receiving it, the buyer can check:
- Physical dimensions
- Product fit
- Material texture
- Opening experience
- Color
- Finishing
- Insert performance
- Overall quality
Courier cost, destination and delivery details should be confirmed before shipment.
Step 8: Confirm the Bulk Order and Final Adjustments
When the buyer is satisfied with the sample, the bulk-production order can be confirmed.
If the sample is not completely satisfactory, the buyer can provide a clear adjustment list before the bulk order is finalized.
Useful feedback should be specific.
For example:
- Increase the cavity width by 2 mm
- Reduce the box height
- Move the logo higher
- Change the foil color
- Make the drawer easier to pull
- Use a firmer insert
- Add more finger-removal space
- Adjust the accessory compartment
Changes to dimensions, structure, materials, inserts or finishing may affect the price and production schedule. These effects should be confirmed before the order enters production.
Step 9: Approve the Pre-Production Sample
After the bulk order is confirmed and before full production begins, QX Packs prepares a pre-production sample based on the final approved requirements.
The pre-production sample is used to reconfirm:
- Final structure
- Final dimensions
- Approved artwork
- Materials
- Printing
- Finishing
- Insert layout
- Product fit
- Required adjustments
Photographs and videos are sent to the buyer for approval.
Bulk production begins after the pre-production sample is confirmed.
This additional confirmation helps ensure that the production team is working from the latest approved specification.
Step 10: Bulk Production and Final Production Confirmation
During bulk production, the packaging goes through the applicable processes, which may include:
- Printing
- Lamination
- Die-cutting
- Foil stamping
- Embossing or debossing
- Board cutting
- Paper wrapping
- Box assembly
- Insert cutting or forming
- Product-fit checking
- Quality control
- Export-carton packing
After production is completed, QX Packs provides bulk-production photographs and videos for the buyer to review.
Final packing, shipping marks, delivery arrangements and other order requirements are then confirmed according to the agreed project details.
From AI Concept to Bulk Production
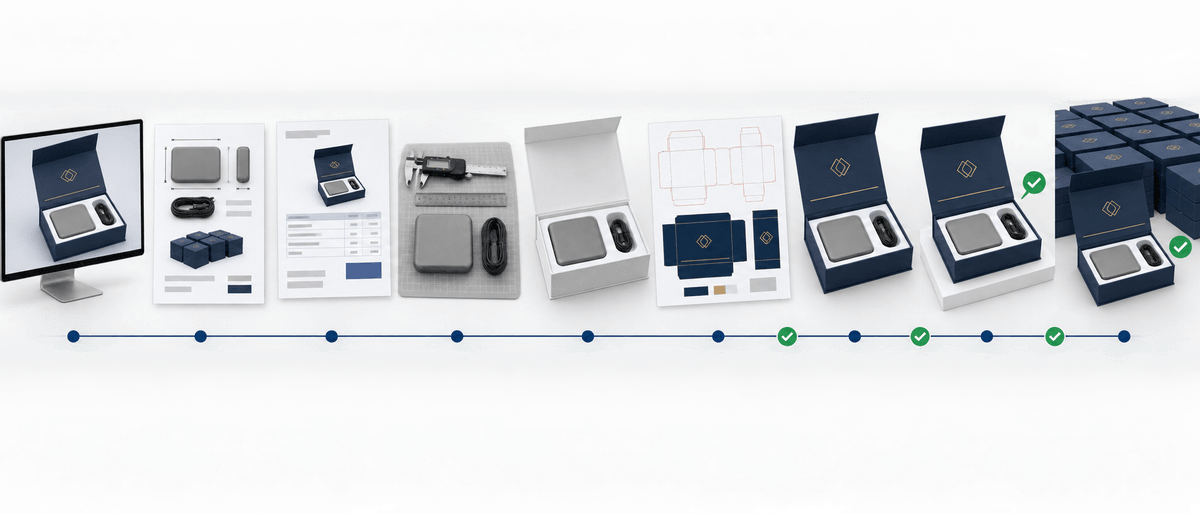
The complete process can be summarized as follows:
AI or visual reference → project information → preliminary estimate → physical product review → white prototype → size and structure approval → dieline → editable artwork → printed sample → sample approval → bulk order → pre-production sample → mass production
Each stage solves a different problem.
Skipping directly from an AI image to a final quotation or production order creates unnecessary risk because the structure, dimensions, product fit, material and manufacturing method have not yet been verified.
What to Send QX Packs for the First Review
| Required Information | What to Provide |
|---|---|
| AI or reference image | Mark the parts you like: color, opening, material appearance, insert layout or overall style. |
| Real product photos | Front, side, top, back and complete-set views. |
| Product dimensions | Length × width × height for every item. |
| Product weight | Individual product weight or complete-set weight. |
| Quantity per box | Number of products and accessories in one package. |
| Quantity per design | Required production quantity for every artwork or SKU. |
| Functional requirements | Opening, protection, display, shipping and product-removal needs. |
| Material direction | Paperboard, rigid board, wood, plastic, metal or not yet confirmed. |
| Insert requirements | EVA, foam, paperboard, molded pulp, blister, pillow or not yet confirmed. |
| Artwork status | AI image, logo only, editable artwork or an existing dieline. |
| Destination | Country and postcode if shipping requirements need to be considered. |
If these details are not available, QX Packs can discuss the general direction, but an accurate production quotation may not yet be possible.
Common Mistakes to Avoid
Treating an AI Image as a Technical Drawing
An AI image may show the appearance but not the engineering needed to manufacture the box.
Asking for a Final Price Before Confirming the Structure
Different interpretations of the same image may require different materials, inserts, labor and tooling.
Preparing Final Artwork Before the Dieline Is Approved
If the structure or dimensions change, artwork prepared too early may need to be rebuilt.
Not Sending the Real Product
For fitted inserts, irregular products or multi-item sets, small measurement differences can affect the final fit.
Expecting a Handmade Sample to Match Die-Cut Production Exactly
A handmade sample may have rougher cutting or assembly details than mass production. It should still be carefully reviewed for structure, dimensions, product fit, materials, artwork and finishing.
Approving Only the Outside Appearance
The insert, product removal, accessory layout and opening experience should be checked together with the exterior.
Frequently Asked Questions
Can QX Packs quote directly from an AI-generated packaging image?
An AI image can support an initial discussion and preliminary estimate, but it is usually not sufficient for an accurate final quotation. Product dimensions, quantity, structure, materials, insert requirements and finishing details still need to be confirmed.
Can an AI packaging structure be manufactured exactly as shown?
Not always. Some AI images contain impossible connections, unsupported parts, conflicting openings or unrealistic material thicknesses. The structure must first be reviewed and converted into a feasible packaging design.
Do I need to provide a finished dieline before contacting QX Packs?
No. If the structure has not been confirmed, send the product information and visual reference first. After the structure, size and white prototype are approved, QX Packs can provide the appropriate dieline.
Do I need editable artwork?
Editable artwork is normally needed before the final printed sample and production. The artwork should be prepared on the confirmed dieline. If you do not have a designer, paid design support can be discussed.
Should I send the physical product?
It is strongly recommended when the packaging requires a fitted insert, precise dimensions or several accessories. If possible, arrange shipment from your supplier in China to reduce time and international courier cost.
What is a white prototype?
A white prototype is an unprinted structural sample used to confirm size, opening, product fit, insert layout and general construction before final artwork and decoration are added.
Why can the printed sample look rougher than bulk production?
Custom samples are often cut and assembled by hand instead of using the complete mass-production die-cutting setup. Some edges, folds or assembly details may therefore look slightly rougher than bulk production.
Can I approve a sample using only photographs and videos?
Yes, some buyers approve samples remotely. Other buyers prefer to receive the physical sample before confirming the bulk order. The appropriate option depends on the project, material, finishing and approval requirements.
Can changes still be made after the sample?
Yes. Adjustments can be reviewed before the bulk order is finalized. Changes to the structure, size, material, insert or finishing may affect price and production time.
Is another sample made before bulk production?
QX Packs prepares a pre-production sample based on the final approved order requirements. Photographs and videos are provided for confirmation before full production begins.
Turn Your Packaging Concept into a Manufacturable Project
An AI-generated image can be a useful starting point, but successful custom packaging requires real product information, feasible engineering, an approved structure, a correct dieline and production-ready artwork.
Send QX Packs your AI or reference image together with real product photographs, accurate dimensions, quantity per design, functional requirements, insert needs and artwork status.
We will review whether the concept can be developed into a practical packaging structure and advise what needs to be confirmed before quotation and sampling.
You can also review our complete custom packaging process or contact QX Packs to discuss your project.